What you'll need to get started
The beauty of latch hook is how minimal the setup is. Unlike most crafts, there's no complicated kit, no years of practice required, and no steep equipment cost. You need three things.
The defining piece of equipment. A small handle with a hooked head and a hinged latch that opens and closes as you work. One tool, used for every single knot.
A stiff mesh fabric with evenly spaced holes. Each hole is where a piece of yarn will go. The grid structure is what gives latch hook its clean, consistent finish.
Short lengths of yarn, pre-cut to the right size. Most kits come with these ready to go, sorted by colour. Each piece of yarn becomes one knot.
A printed guide showing which colour goes where on the grid. Kits usually include this. For freeform work, you can design your own or go entirely by feel.
If you're picking up a kit for the first time, it'll come with all of the above — canvas, pre-cut yarn in your colours, the latch hook tool, and a printed pattern to follow. You just need to sit down and start.
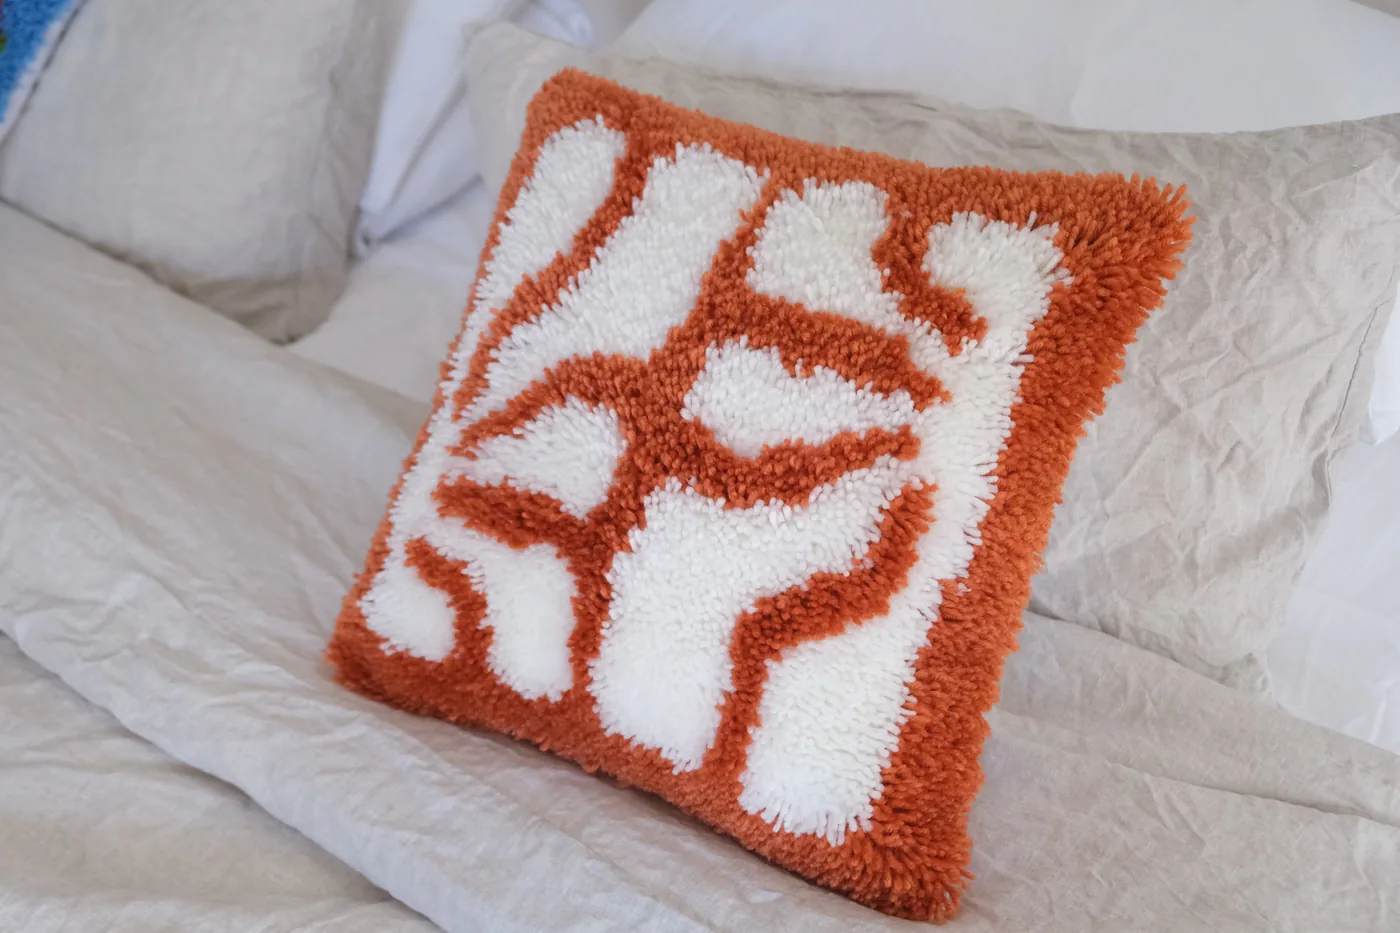
Australian-designed cushion kits — everything above included, $69. Free AU shipping.
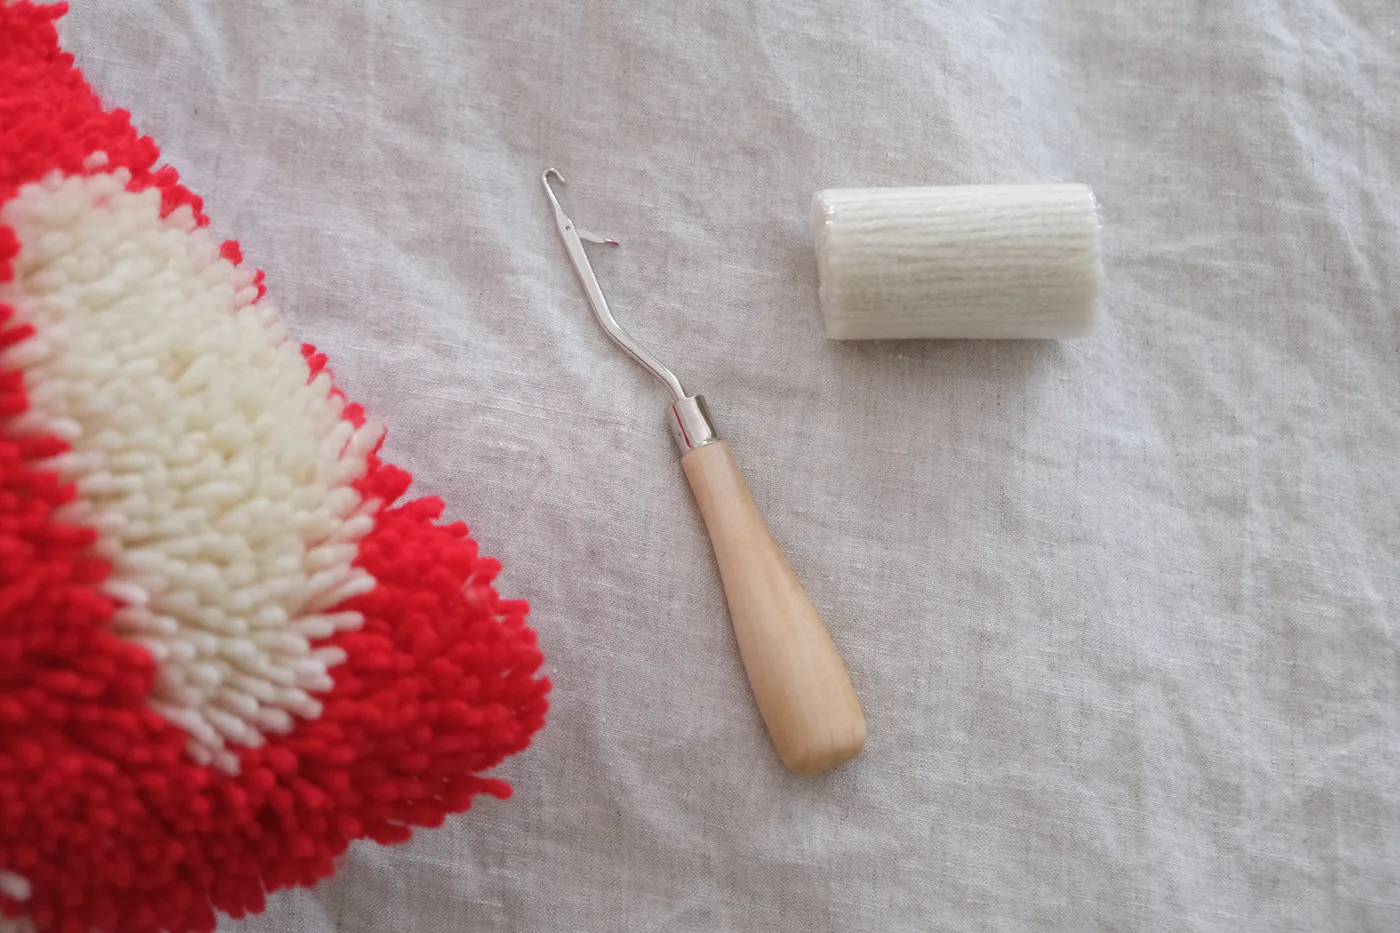
The latch hook tool — everything you need to create each knot.
Watch it first
Before going through the steps in detail, it's worth seeing the technique in action. The motion is quick to demonstrate and instantly easier to understand visually than it is in words.
Once you've watched it through once, the step-by-step breakdown below will make a lot more sense. Most people find the technique clicks immediately after seeing it demonstrated.
The technique, step by step
The latch hook motion is a single repeating action. Once you've done it a few times, it becomes completely automatic — and the repetition is a big part of what makes latch hook so meditative.
-
Fold the yarn in half over the hook
Take one piece of pre-cut yarn and fold it in half. Hook the centre of the fold onto the shaft of the latch hook, below the latch. Hold the two ends together in your other hand.
-
Push the hook through the canvas hole
Insert the hook down through one hole in the canvas grid and up through the hole directly above it. The latch should open as you push through.
-
Pull the yarn ends through the loop
With the hook through the canvas, bring the two loose ends of yarn across and place them inside the hook head. Begin to pull the hook back through the canvas — the latch closes, catching the ends.
-
Pull through and tighten
Continue pulling until the two ends come fully through the loop. Give them a gentle tug to snug the knot against the canvas. The yarn is locked in place — that's one complete knot.
The latch — the small hinged piece on the hook — closes automatically as you pull back, catching the yarn ends and pulling them through the loop. You don't need to touch it. It does the job on its own.

The hook in action — the motion becomes completely natural within a few minutes.
Your first row
Start at the bottom-left corner of your canvas and work across in rows, left to right. Complete one row fully before moving to the next. This gives you clean, even coverage and makes it easy to follow a pattern without losing your place.
Don't worry too much about consistency at first. Your tension will naturally even out over the first few rows as the motion becomes familiar. Any variation in the first row usually gets compressed and hidden as you fill in around it.
Work one colour section at a time if you're following a pattern — it's easier to batch the same colour rather than switching back and forth. Sort your pre-cut yarn by colour before you start if it arrives mixed.
Reading a pattern
Latch hook patterns are grid-based — each square on the pattern corresponds to one hole on your canvas. Each colour is usually represented by a symbol or a number, with a legend that maps each symbol to a yarn colour.
Most printed patterns are sized to match the canvas they're designed for, so the grid squares line up directly. Some people find it helpful to mark off rows as they complete them, especially on larger pieces.
If your kit comes with a pre-printed canvas (where the pattern is already marked directly on the grid), you don't need to refer to a separate pattern at all — just match the yarn colour to the marked section and fill it in.
Finishing your work
Once every hole in the canvas is filled, your latch hook piece is structurally complete. From here, the finishing steps depend on what you're making.
For cushion covers
Fold the unworked canvas border over the back of the piece, securing it in place. If your kit included a backing fabric and cushion cover, follow the included instructions to assemble. Insert the cushion pad and zip or press closed.
For wall hangings or rugs
Trim the canvas border to about 2–3cm around the worked area. Fold the border to the back and secure with fabric glue, iron-on tape, or hand stitching. For wall hangings, attach a dowel or rod across the top before folding the border, then hang with twine or cord.
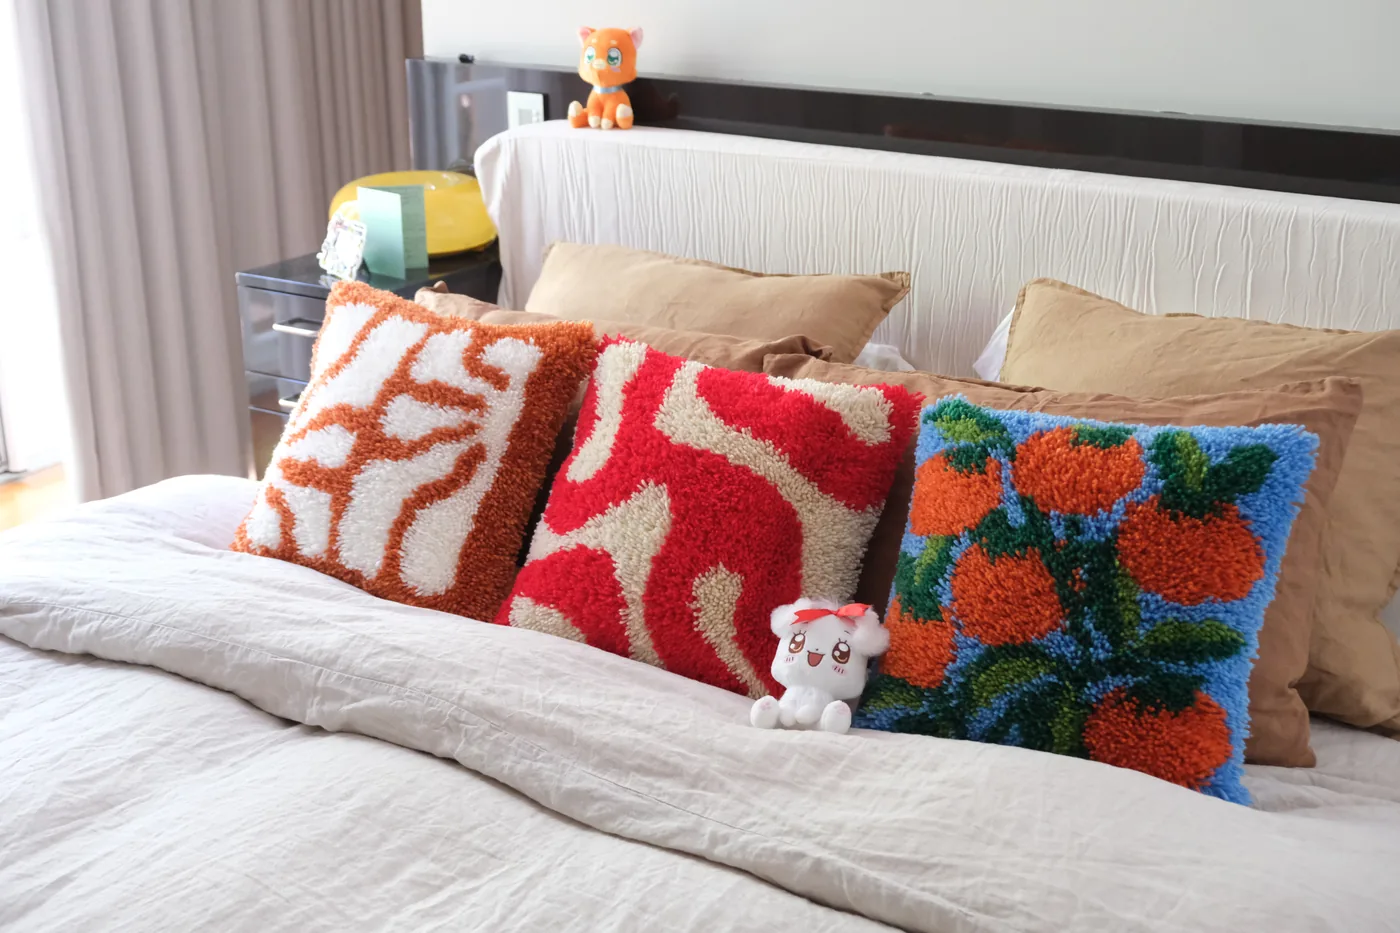

Finished pieces — the result is dense, textured, and genuinely satisfying to make.
Beginner tips worth knowing
A few things that make a real difference, especially in the first session.
-
Work from the bottom up
Start at the bottom edge and work row by row upward. This keeps completed rows out of the way and gives you a cleaner working area as you go.
-
Don't pull too tight
A firm, even pull is all you need. Yanking hard can distort the canvas over time. The knot locks itself — trust the process.
-
Sort your yarn before you start
If your kit arrives with yarn mixed together, spend 5 minutes sorting by colour first. It makes working through a pattern much faster.
-
Give it the first 10 minutes
The first few knots feel slightly awkward. By the tenth it's comfortable. By the hundredth it's completely automatic. Give it the first 10 minutes before you judge how you're going.